Getting Started With Redis: A Python Tutorial
Explore the concepts and build a library

Explore the concepts and build a library
Contents
- Prerequisites
- What is Redis?
- Setting up a local Redis server using Docker
- Exploring basic Redis concepts using a CLI client
- Building and using your own Python Redis library
- Using a real Python library for Redis
- Summary
Prerequisites
- Docker
- Python 3.6+
What Is Redis?
The Redis docker page says that it is “an open-source, networked, in-memory, key-value data store with optional durability.” This description captures the key (nice unintentional pun) features of Redis.
Open source — Anyone can inspect Redis’ code or contribute to the project.
Networked— Redis uses the client-server model, in which communication between clients and servers happens over a network. In this tutorial, both a client and server are run on a single machine. In production systems, a load-balanced, multinode Redis cluster (of servers) will service requests from several clients.
In-memory — Redis stores data in primary computer memory (i.e., RAM). Review the computer memory hierarchy. Data stored in RAM is more quickly accessed than data stored in slower (secondary) memory such as on disk. This is what makes Redis fast and suitable for applications that require low-latency access to data (e.g., caching).

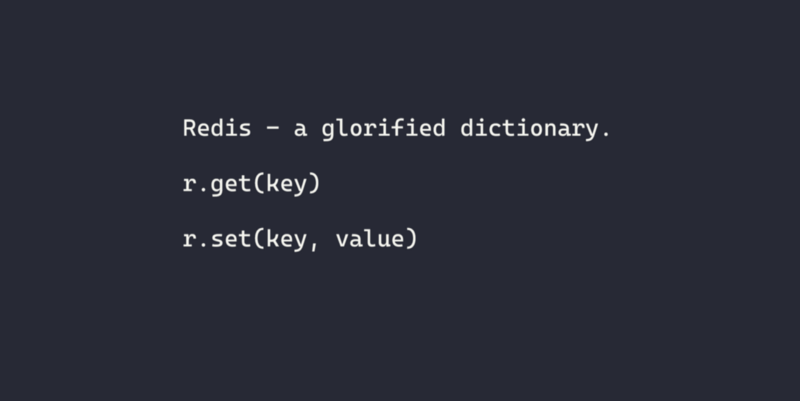
Key-value data store — Redis is a glorified dictionary. The main operations supported are setting keys with their values and getting values using their associated keys, and other variations of this. In fact, Redis aptly means remote dictionary server, pointing to its networked and key-value storage characteristics.
Optional durability — Martin Kleppmann, author of Designing Data-Intensive Applications: The Big Ideas Behind Reliable, Scalable, and Maintainable Systems, defines durability as “the promise that once a transaction has committed successfully, any data it has written will not be forgotten, even if there is a hardware fault or the database crashes.”
Redis, being an in-memory data store, isn’t fully durable by default. There is a chance that some of the data that was successfully written to Redis may be lost in the event the Redis host fails. Review the computer memory hierarchy. Notice that RAM is volatile, meaning that if the power is lost, well, so too is what’s stored in RAM. This is undesirable for anyone who wants to build systems that maximize performance without compromising durability. Fortunately, Redis provides several persistence options with different performance durability profiles, including an option that affords full durability.
Data type diversity — A key characteristic omitted from the Redis Docker page’s description is Redis’ native support for different types of data structures for its values, but this is captured elsewhere. For instance, the Redis project’s description on GitHub mentions its support for various data structures including “Strings, Lists, Sets, Sorted Sets, Hashes, Streams, HyperLogLogs, Bitmaps.” This flexibility makes working with Redis a lot more like working with the dictionary data structures available to us in programming languages like Python. It also makes Redis an easy choice for supporting applications that would benefit from the constraints those data structures provide.
Setting Up a Local Redis Server Using Docker
Setting up servers for tools like Redis can be a painful exercise that is unnecessary to endure when being exposed to the tool for the first time. In this tutorial, we will use Docker as a black-box program. Docker is a hot tool and many people have it on their learning list, but you don’t need to know its intricacies and idiosyncrasies to work through this tutorial. Just use it.
Pull the latest Redis Docker image (v6.2.2 at the time of writing)
This is like downloading the installation file for Redis.docker pull redis
Run the Redis server as a daemon (background process)
In this command, we map port 6379 on our computer to the exposed port 6379 from the Redis container. Port 6379 is the default port for Redis servers.docker run -d -p 6379:6379 --name redis-server redis
Exploring Basic Redis Concepts Using a CLI Client
In this section, you will learn about Redis databases, how to set key-value pairs, how to get values using their respective keys, and how to delete keys.
Connect to the Redis server
The Redis server we started in the previous section has a Redis CLI client built into it. We’ll use that for this part of the tutorial.docker exec -it redis-server redis-cli
Concept 1. Databases
After connecting to the Redis server through the Redis CLI program, we’re met with a prompt that looks like this. It merely shows the IP address and port number of the server we’re connected to.127.0.0.1:6379>
Redis has this concept of databases, which are indexed groups of key-value pairs. What does that mean? Let’s say you have two applications that need a Redis server. They both store key-value pairs that use the same key (e.g., an entity’s ID), but they store different values associated with those keys. The first application may want to store key-value pairs of StudentID to StudentEnrolledCourses, while the second application may want to store key-value pairs of StudentID to StudentProfiles. The exact type of the StudentEnrolledCourses and StudentProfiles doesn’t matter here. What does matter is that the keys come from the same domain (in set theoretic terms). This means there will be problematic key collisions if both applications write their keys to the same Redis database on the Redis server.
This problem could be solved by having multiple Redis servers, but that’s inelegant and heavy-handed. Another solution is for a Redis server to have multiple databases identified by unique symbols that represent independent groups of key-value pairs. This is exactly what Redis allows. Redis has multiple databases identified by integers that independently group key-value pairs.
Returning to our example, the first application can use Redis database 1 and the second application can use Redis database 2. The default Redis database has the index 0, and we are automatically set to use it when we log into a Redis server. We can change the database we want to use by issuing the SELECT command.127.0.0.1:6379> SELECT 1
OK
127.0.0.1:6379[1]>
For the remainder of this tutorial, we will use the database indexed with 1. This is an arbitrary choice, so feel free to choose a different index if you want to color outside the lines a bit.
Concept 2. SETting key-value pairs
Setting key-value pairs has a simple syntax. Here it is.127.0.0.1:6379[1]> SET hello world
OK
After setting a key-value pair, we get a nice “OK” to tell us that the operation succeeded.
You can set auto-expiring keys too. There are multiple options for how to expire a key such as seconds (EX), milliseconds (PX), and timestamp in seconds (EXAT) to list some of them.127.0.0.1:6379[1]> SET bye "In 60 seconds, I'll self-delete" EX 60
OK
Concept 3. GETting values using their respective keys
Getting a value by using its key also has a simple syntax. Look at that! 😲127.0.0.1:6379[1]> GET hello
"world"# before 60 seconds elapses127.0.0.1:6379[1]> GET bye
"In 60 seconds, I'll self-delete"# after 60 seconds elapses127.0.0.1:6379[1]> GET bye
(nil)
Concept 4. DELeting a key127.0.0.1:6379[1]> DEL hello
OK
127.0.0.1:6379[1]> GET hello
(nil)
Building and Using Your Own Python Redis Library
Redis is a glorified dictionary.
Let me show you that Redis is really a glorified dictionary with an oversimplified implementation of the Python interface for Redis. Though terribly simplified, the implementation strips Redis down to its essence and removes any hesitation you might have that stems from the perceived complexity of using the tool. The only thing that remains in this implementation is that we have an in-memory key-value data store.
redisx.py
Let’s use our library!
redisx_hello_world.py
Using a Real Python Library for Redis
Install the redis-py Python librarypython -m pip install redis==3.5.3
We can modify the client code we wrote in the previous section to our locally running Redis server and execute some basic operations on it.
I’ll spare you the “spot the difference” exercise and note that in this version of the client code, the Redis class was given a value for its host and port parameters. Also, the value we get back is a binary value (as indicated by the b prefix). We can convert the returned values to their simpler Python type using the .decode() method, which is shown in the code that follows.
Let’s replicate what we did in the Redis CLI client through our Python client.
Summary
Redis is a popular key-value data store known for its speed and flexibility. In this tutorial, I described some of the more commonly discussed Redis features. And we set up a local Redis server using Docker and explored basic Redis concepts such as databases, setting key-value pairs, getting values, and deleting keys using a Redis CLI client. We also built and used our own Python Redis library to get our hands on the essence of Redis. Finally, we used the redis-py Python library to write a basic Redis client that replicated our interactions with the Redis server from our previous exploration of basic Redis concepts.
This tutorial is very reductive, but it paints a simple view of Redis that makes it easier for new adopters to start using the tool more quickly. Redis’ sophistication and associated complexities are very real, and they can both serve you well and present challenges. But a discussion of its sophisticated affordances, complexities, and the ways they can help or hinder you is a topic for another time.
To learn about more Redis features, take a look at its documentation.
Thank you for reading!
More Computing Resources
Watch videos covering a variety of topics in Computing at OnelTalksTech.com


